Hello Codefussionist!
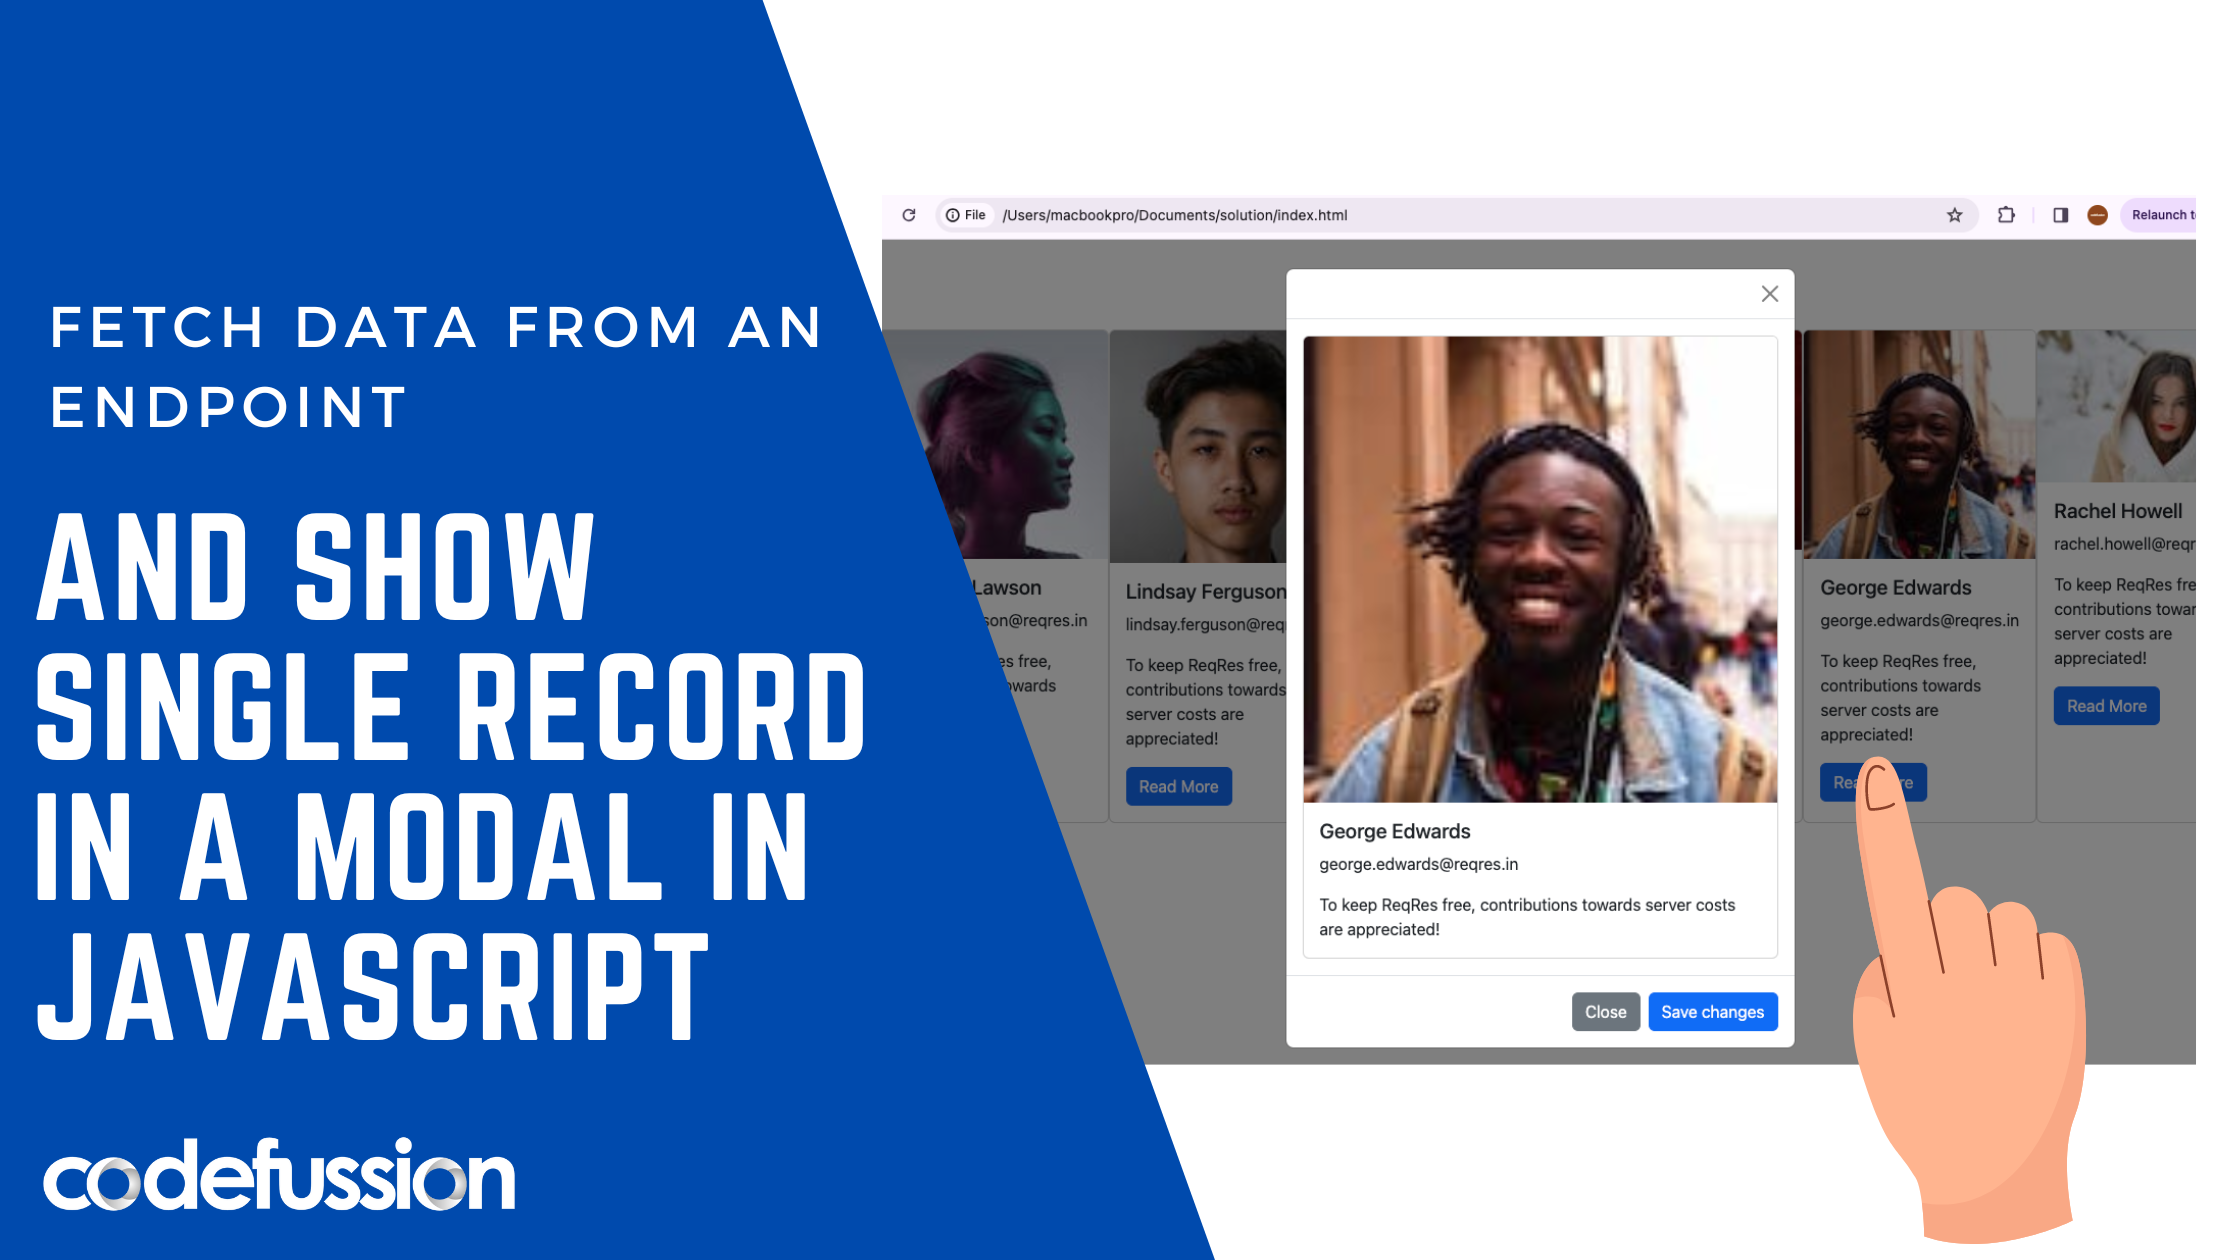
Today we are going to be creating an exciting tutorial on JavaScript. We are going to fetch data from an endpoint and display the records in a card, and at the same time we want to be able to preview each record when we click on the “view more” button.
Before we delve straight into coding let us some reasons why records should be viewed individually.
Benefits of Previewing Single Record From an Endpoint
- Enhanced User Experience: Previewing a single record can also benefit end-users by providing them with a more streamlined and responsive experience. Instead of waiting for large datasets to load, users can quickly preview individual records, leading to faster page load times and improved usability.
- Reduced Bandwidth Usage: Previewing a single record reduces the amount of data transferred between the client and server, resulting in lower bandwidth usage. This is particularly advantageous for mobile applications or low-bandwidth environments where minimizing data transfer is important for performance and cost efficiency.
- Fine-tuning Queries: When working with endpoints that support filtering or querying parameters, previewing a single record allows developers to fine-tune their query parameters and test their effectiveness in retrieving the desired results. This iterative approach helps optimize query performance and accuracy.
All right. Let’s start coding now. We want want to be able to display the names, images, emails and contributions of users in a Bootstrap card. We will be using two endpoints from reqres:
- https://reqres.in/api/users?page=2 — to list all users
- https://reqres.in/api/users?id=${id} — to view a single user
Now take the first link and paste in your browser. You should get the following response below:
{"page":2,"per_page":6,"total":12,"total_pages":2,"data":[{"id":7,"email":"michael.lawson@reqres.in","first_name":"Michael","last_name":"Lawson","avatar":"https://reqres.in/img/faces/7-image.jpg"},{"id":8,"email":"lindsay.ferguson@reqres.in","first_name":"Lindsay","last_name":"Ferguson","avatar":"https://reqres.in/img/faces/8-image.jpg"},{"id":9,"email":"tobias.funke@reqres.in","first_name":"Tobias","last_name":"Funke","avatar":"https://reqres.in/img/faces/9-image.jpg"},{"id":10,"email":"byron.fields@reqres.in","first_name":"Byron","last_name":"Fields","avatar":"https://reqres.in/img/faces/10-image.jpg"},{"id":11,"email":"george.edwards@reqres.in","first_name":"George","last_name":"Edwards","avatar":"https://reqres.in/img/faces/11-image.jpg"},{"id":12,"email":"rachel.howell@reqres.in","first_name":"Rachel","last_name":"Howell","avatar":"https://reqres.in/img/faces/12-image.jpg"}],"support":{"url":"https://reqres.in/#support-heading","text":"To keep ReqRes free, contributions towards server costs are appreciated!"}}
Next, we will consume the endpoint using fetch:
  fetch("https://reqres.in/api/users?page=2", {
          method: 'GET',
        })
          .then(response => response.json())
          .then(responseJson => {
             console.warn(responseJson);
             })
          })
          .catch(error => {
            {
              alert(error)
            }
    })
Here’s the response:
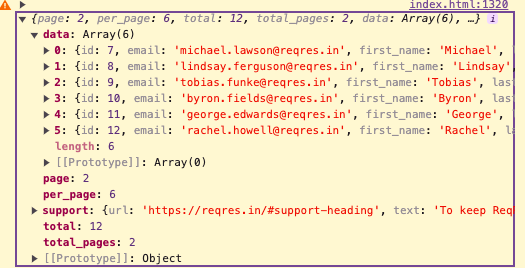
Next, we need to loop through this response and display the results in a card:
    fetch("https://reqres.in/api/users?page=2", {
          method: 'GET',
        })
          .then(response => response.json())
          .then(responseJson => {
             console.warn(responseJson);
             var html = "";
             responseJson.data.map((item, index) => {
               html+="<div class='row'>";
               html+="<div class='card-group'>";
               html+="<div class='card'>";
               html+="<img src="+item.avatar+" class='card-img-top'>";
               html+="<div class='card-body'>";
               html+="<h5 class='card-title'>"+item.first_name+" "+item.last_name+"</h5>";
               html+="<p class='card-text'>"+item.email+"</p>";
               html+="<p class='card-text'>"+responseJson.support.text+"</p>";
               html+=`<button data-bs-toggle="modal" data-bs-target="#exampleModal" onclick='readMore(${item.id})' class='btn btn-primary'>Read More</button>`;
               html+="</div>";
               html+="</div>";
               html+="</div>";
               html+="</div>";
             })
             document.getElementById("card").innerHTML = html;
          })
          .catch(error => {
            {
              alert(error)
            }
    });
We’ll add our HTML:
<!DOCTYPE html>
<html lang="en" dir="ltr">
  <head>
    <meta charset="utf-8">
    <title>Fetch API</title>
     <link href="https://cdn.jsdelivr.net/npm/bootstrap@5.3.3/dist/css/bootstrap.min.css" rel="stylesheet" integrity="sha384-QWTKZyjpPEjISv5WaRU9OFeRpok6YctnYmDr5pNlyT2bRjXh0JMhjY6hW+ALEwIH" crossorigin="anonymous">
     <script src="https://cdn.jsdelivr.net/npm/@popperjs/core@2.11.8/dist/umd/popper.min.js" integrity="sha384-I7E8VVD/ismYTF4hNIPjVp/Zjvgyol6VFvRkX/vR+Vc4jQkC+hVqc2pM8ODewa9r" crossorigin="anonymous"></script>
     <script src="https://cdn.jsdelivr.net/npm/bootstrap@5.3.3/dist/js/bootstrap.min.js" integrity="sha384-0pUGZvbkm6XF6gxjEnlmuGrJXVbNuzT9qBBavbLwCsOGabYfZo0T0to5eqruptLy" crossorigin="anonymous"></script>
  </head>
  <body>
  <div class="row">
  <div class="d-flex" id="card">
  </div>
  </div>
  </body>
  </html>
Here’s what you should get so far:
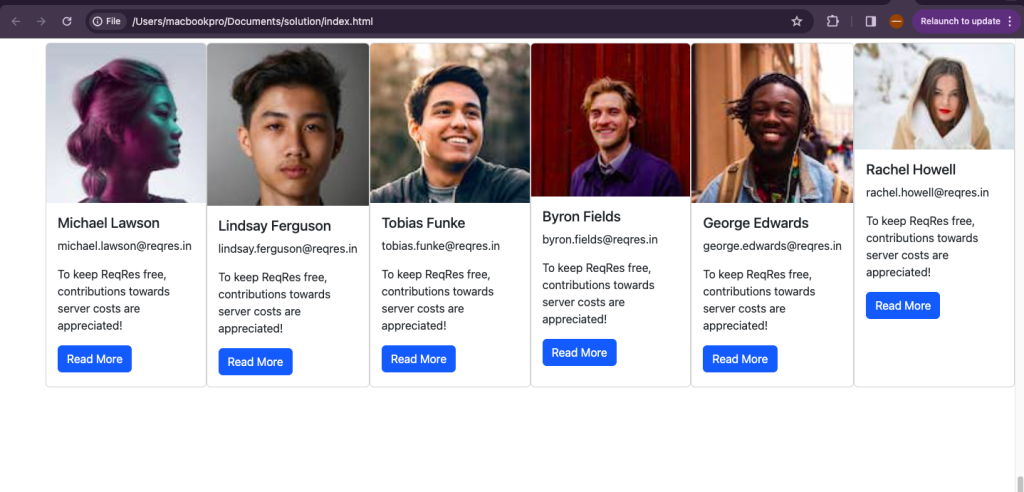
Next, we need to add our modal class. But before we do that we need to create a function and pass the user id and we will be making use of the second endpoint. We will modify our button as follows:
html+=`<button data-bs-toggle="modal" data-bs-target="#exampleModal" onclick='readMore(${item.id})' class='btn btn-primary'>Read More</button>`;
We will create our readMore() function:
 readMore = (id) => {
   // alert(val)
   fetch(`https://reqres.in/api/users?id=${id}`, {
           method: 'GET',
         })
           .then(response => response.json())
           .then(responseJson => {
              // console.warn(responseJson.data);
              var html = "";
                html+="<div class='row'>";
                html+="<div class='card-group'>";
                html+="<div class='card'>";
                html+="<img src="+responseJson.data.avatar+" class='card-img-top'>";
                html+="<div class='card-body'>";
                html+="<h5 class='card-title'>"+responseJson.data.first_name+" "+responseJson.data.last_name+"</h5>";
                html+="<p class='card-text'>"+responseJson.data.email+"</p>";
                html+="<p class='card-text'>"+responseJson.support.text+"</p>";
                html+="</div>";
                html+="</div>";
                html+="</div>";
                html+="</div>";

              document.getElementById("card-user").innerHTML = html;
           })
           .catch(error => {
             {
               alert(error)
             }
     })
 }
Next, we need to add our modal as follows:
<div class="modal fade" id="exampleModal" tabindex="-1" aria-labelledby="exampleModalLabel" aria-hidden="true">
  <div class="modal-dialog">
    <div class="modal-content">
      <div class="modal-header">
        <h1 class="modal-title fs-5" id="exampleModalLabel"></h1>
        <button type="button" class="btn-close" data-bs-dismiss="modal" aria-label="Close"></button>
      </div>
      <div class="modal-body">
        <div id="card-user">
        </div>
      </div>
      <div class="modal-footer">
        <button type="button" class="btn btn-secondary" data-bs-dismiss="modal">Close</button>
        <button type="button" class="btn btn-primary">Save changes</button>
      </div>
    </div>
  </div>
</div>
Here’s the full code:
<!DOCTYPE html>
<html lang="en" dir="ltr">
  <head>
    <meta charset="utf-8">
    <title>Fetch API</title>
     <link href="https://cdn.jsdelivr.net/npm/bootstrap@5.3.3/dist/css/bootstrap.min.css" rel="stylesheet" integrity="sha384-QWTKZyjpPEjISv5WaRU9OFeRpok6YctnYmDr5pNlyT2bRjXh0JMhjY6hW+ALEwIH" crossorigin="anonymous">
     <script src="https://cdn.jsdelivr.net/npm/@popperjs/core@2.11.8/dist/umd/popper.min.js" integrity="sha384-I7E8VVD/ismYTF4hNIPjVp/Zjvgyol6VFvRkX/vR+Vc4jQkC+hVqc2pM8ODewa9r" crossorigin="anonymous"></script>
     <script src="https://cdn.jsdelivr.net/npm/bootstrap@5.3.3/dist/js/bootstrap.min.js" integrity="sha384-0pUGZvbkm6XF6gxjEnlmuGrJXVbNuzT9qBBavbLwCsOGabYfZo0T0to5eqruptLy" crossorigin="anonymous"></script>
  </head>
  <body>
  <div class="row">
  <div class="d-flex" id="card">
  </div>
  </div>

<!-- Modal -->
<div class="modal fade" id="exampleModal" tabindex="-1" aria-labelledby="exampleModalLabel" aria-hidden="true">
  <div class="modal-dialog">
    <div class="modal-content">
      <div class="modal-header">
        <h1 class="modal-title fs-5" id="exampleModalLabel"></h1>
        <button type="button" class="btn-close" data-bs-dismiss="modal" aria-label="Close"></button>
      </div>
      <div class="modal-body">
        <div id="card-user">
        </div>
      </div>
      <div class="modal-footer">
        <button type="button" class="btn btn-secondary" data-bs-dismiss="modal">Close</button>
        <button type="button" class="btn btn-primary">Save changes</button>
      </div>
    </div>
  </div>
</div>

<script>
  fetch("https://reqres.in/api/users?page=2", {
          method: 'GET',
        })
          .then(response => response.json())
          .then(responseJson => {
             //console.warn(responseJson);
             var html = "";
             responseJson.data.map((item, index) => {
               html+="<div class='row'>";
               html+="<div class='card-group'>";
               html+="<div class='card'>";
               html+="<img src="+item.avatar+" class='card-img-top'>";
               html+="<div class='card-body'>";
               html+="<h5 class='card-title'>"+item.first_name+" "+item.last_name+"</h5>";
               html+="<p class='card-text'>"+item.email+"</p>";
               html+="<p class='card-text'>"+responseJson.support.text+"</p>";
               html+=`<button data-bs-toggle="modal" data-bs-target="#exampleModal" onclick='readMore(${item.id})' class='btn btn-primary'>Read More</button>`
               html+="</div>";
               html+="</div>";
               html+="</div>";
               html+="</div>";
             })
             document.getElementById("card").innerHTML = html;
          })
          .catch(error => {
            {
              alert(error)
            }
    })

 readMore = (id) => {
   fetch(`https://reqres.in/api/users?id=${id}`, {
           method: 'GET',
         })
           .then(response => response.json())
           .then(responseJson => {
              // console.warn(responseJson.data);
              var html = "";
                html+="<div class='row'>";
                html+="<div class='card-group'>";
                html+="<div class='card'>";
                html+="<img src="+responseJson.data.avatar+" class='card-img-top'>";
                html+="<div class='card-body'>";
                html+="<h5 class='card-title'>"+responseJson.data.first_name+" "+responseJson.data.last_name+"</h5>";
                html+="<p class='card-text'>"+responseJson.data.email+"</p>";
                html+="<p class='card-text'>"+responseJson.support.text+"</p>";
                html+="</div>";
                html+="</div>";
                html+="</div>";
                html+="</div>";

              document.getElementById("card-user").innerHTML = html;
           })
           .catch(error => {
             {
               alert(error)
             }
     })
 }
</script>
  </body>
  </html>
Here are the results:
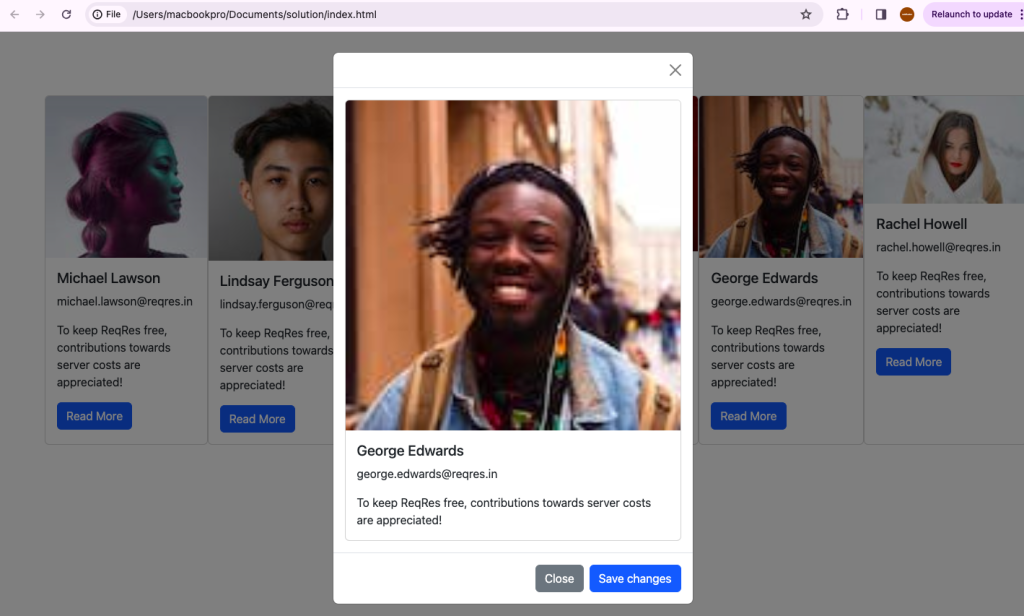
When we click on the read more button, it brings out details of that particular user in a modal.
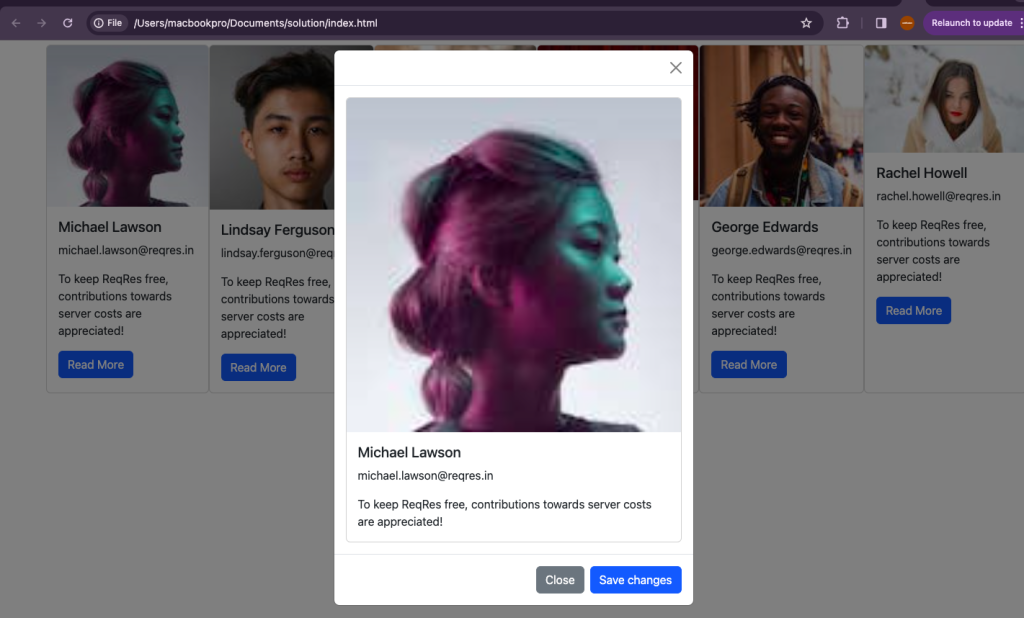
This is it guys! This is how to fetch data from an endpoint and show single user in a modal in JavaScript. Let me know what you think in the comments.
[…] going to make a POST request using Reqres and Fetch API in JavaScript. We’ve previously seen how to make a GET request. But before we go straight to coding, let’s see what a POST request […]